Step by Step: | Protheus Portal makes available Web services to speed up and enable sharing of information between your customers, suppliers, partners, internal and external users, all the communication between the Web servers and the Corporate servers is through Web Services.
To enable the WebServices, the HTTP service must be active. This service enables the information to be put out on the WEB. Thus, configuration starts by enabling the HTTP service, configuring the port to which all other services depending on them will use to put information out. Note: Services must be set by WIZARD (SRVWIZARD), as each WEB module installed are important unzipped files in the directory informed in the configuration. The extensions of these files are exclusive of Microsiga, the *.MZP, only through the Wizard, you can have the proper installation.
Notice: Behavior change
Effective change from LIB Label 20170208, with the font XmlWsCvs.prw with date equal to or later than 03/29/2017, in the versions 11 and 12 of Protheus.
To follow the market guidelines, SOAP services of Protheus do not return the full stack of error.log.
In case of error in the system, a SoapFault 500 is generated only with a message "Internal Server Error". The submission of the error log through the HTTP channel is not executed any longer.
Error may be checked in the system through the log files of apperser.exe.
Source: {+}http://tdn.totvs.com/pages/viewpage.action?pageId=311632028+
To configure, follow the procedure below: - First, download the Portal files in the Customer Portal, and unzip them in the Systemload folder
 For Protheus 11, click here... For Protheus 11, click here...
---- - Customer Portal: {+}http://suporte.totvs.com+ - Menu Downloads and Updating - Protheus Line - Microsiga Protheus Version 11 - All - Category: Portal files - Download file PORTAL FILES
Note: if versions are not being displayed, in "Filters of packages", select "All packages available", then select the category again.
 For Protheus 12, click here... For Protheus 12, click here...
- Customer Portal: {+}http://suporte.totvs.com+ - Click Downloads - In the option Other Lines of the Product, select Protheus - MICROSIGA PROTHEUS VERSION 12.1.XX (where XX is a version of its release) - All - Category: Files of portals - Download file PORTAL FILES Note: if versions are not being displayed, in "Filters of packages", select "All packages available", then select the category again.
- After downloading and unzipping the file, open the Smartclient, and in the Initial Program, enter: SRVWIZARD
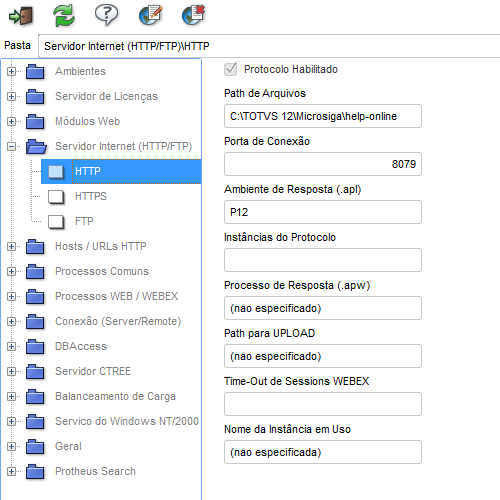
 - Click twice Internet Server (HTTP/FTP) to expand, click HTTP, then check if the box Protocol Enabled is selected, then confirm the Connection Port (we recommend it to be different than 80, which is the standard port of the HTTP, used by Windows services).
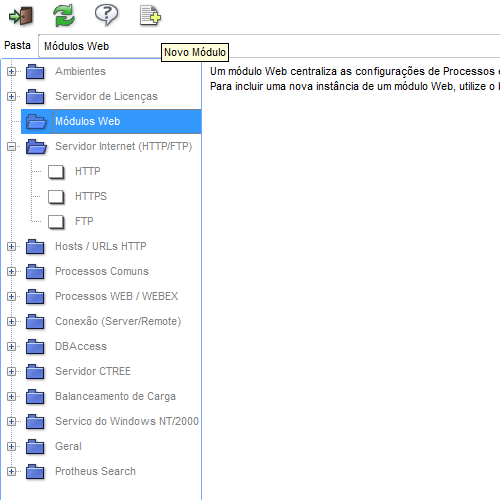
 - After confirmation, click Web Modules, then click New Module
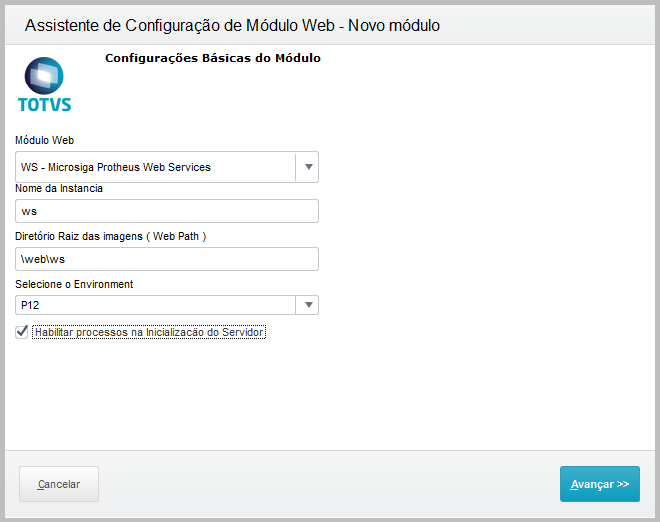
 - In Web Module, select WS - Microsiga Protheus Web Services - In Name of Instance enter ws - The Root Directory of the images is automatically filled out - In Select Environment, click then select Protheus environment that is used - Select box Enable processes in the Initialization of the Server, then click Next
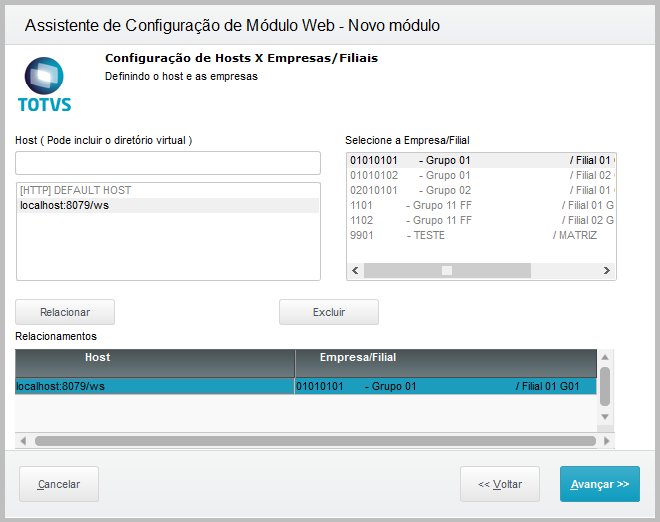
 - On the screen Configuration of Hosts X Companies/Branches, in Hosts, enter address, port and folder of the Webservice folder, according to example: localhost:8079/ws (do not enter"http"). If it is not a local server, enter the server IP. - In Select Company/Branch, select the Company bound to this Webservice, then click Relate. The connection between the Host and the Company is listed in Relationships - Click Next
 - On the screen Configuration of users, in Minimum Users and Maximum Users, which is the number of threads opened in execution (Minimum) and the number of threads opened on hold (Maximum), enter the quantities desired, then click Finalize
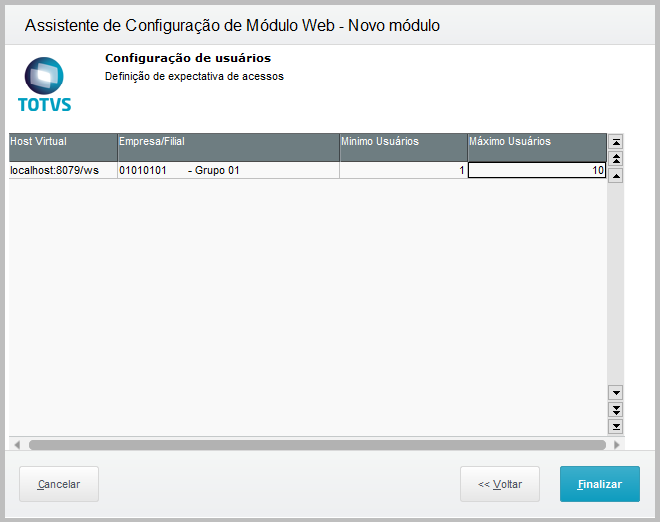 - A confirmation window of the Web Module creation. Click Yes
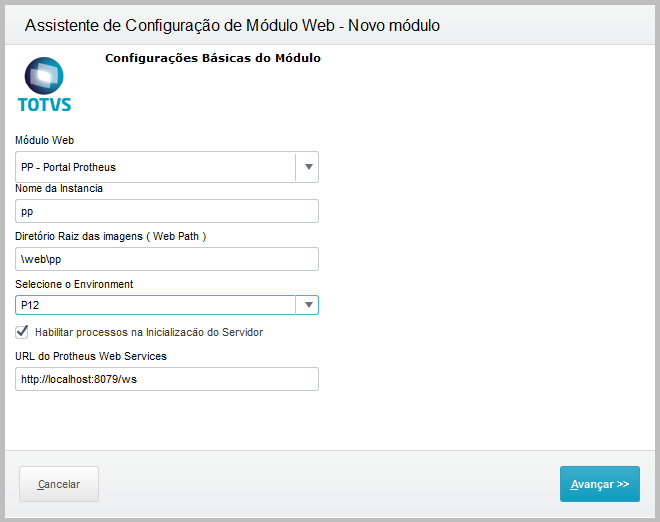
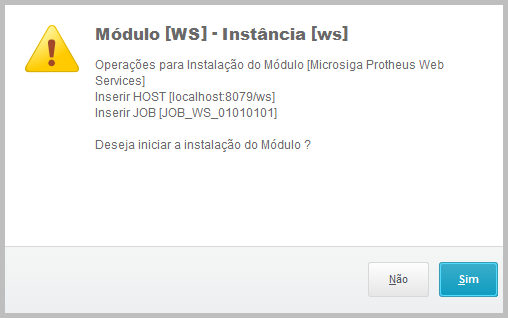 - At the end, a notification is displayed requesting Protheus to be restarted so the configuration starts to work. Click Close - After configuring the Webservice, configure the Portal. Click Web Modules again, then click New Module - In Web Module select PP - Protheus Portal - In Instance Name enter pp - The Root Directory of images is automatically filled out - In Select Environment, click and select Protheus environment to be used - Select box Enable process in Initialization of Server - In Protheus Web Services URL, fill out address created in the previous stage for the Webservice. In our example: http://localhost:8079/ws - Click Next
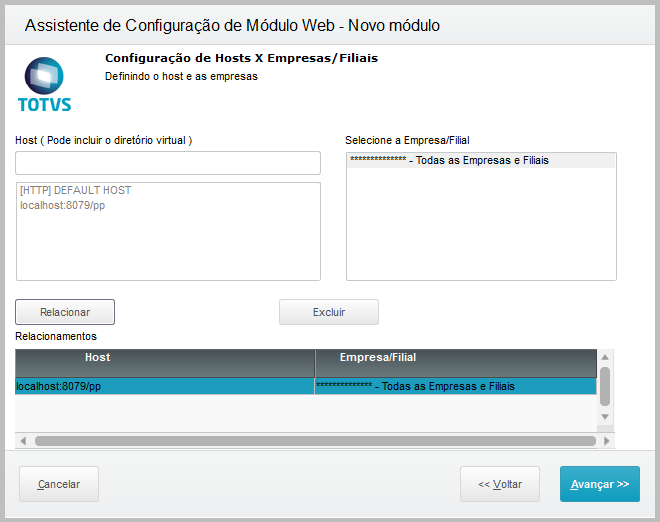
 - On the screen Configuration of Hosts X Companies/Branches, in Hosts, enter address, port and the instance folder of the Portal, according to example: localhost:8079/pp (do not enter "http"). If it is not a local server, enter the server IP. - In Select Company/Branch, select Company bound to this Portal (only option All Companies and Branches are generally displayed), then click Relate. The connection between the Host and the Company is listed in Relationships - Click Next
 - On the screen Configuration of users, in Minimum Users and Maximum Users, which is the number of threads opened in execution (Minimum) and the number of threads opened on hold (Maximum), enter the quantities desired, then click Finalize
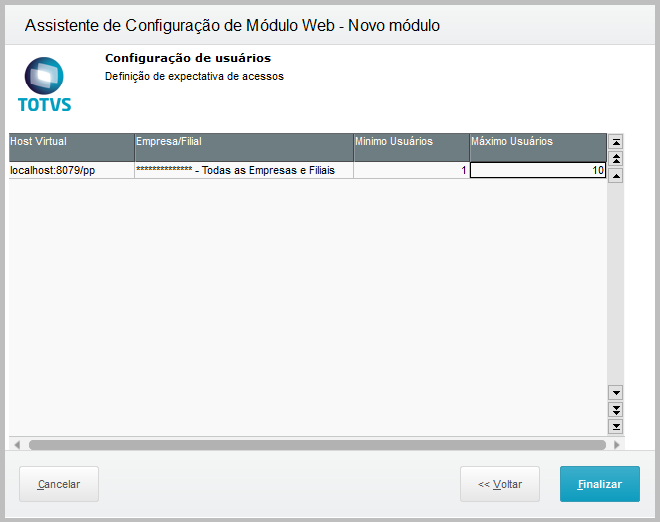 - A confirmation window of the Web Module creation. Click Yes
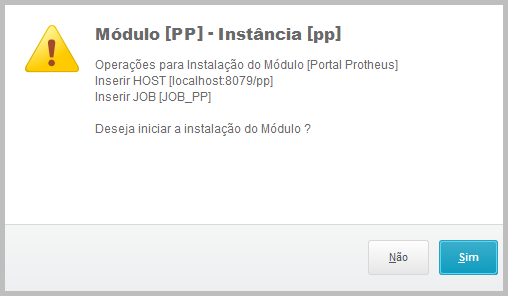 - At the end, a notification is displayed requesting Protheus to be restarted so the configuration starts to work. Click Close
- After configuration, end TOTVS Wizard and restart Protheus so changes starts to work. The appserver.ini file is changed with these configurations, and the HTTP, WebService and Portal configurations must be equal to the example below:
Appserver.ini
<ac:structured-macro ac:name="unmigrated-wiki-markup" ac:schema-version="1" ac:macro-id="15162336-b4e6-47c5-987f-2513f523fe41"><ac:plain-text-body><![CDATA[HTTP] \]></ac:plain-text-body></ac:structured-macro>
ENABLE=1
PORT=8079
PATH=C:\TOTVS 12\Microsiga\help-online
Environment=P12
<ac:structured-macro ac:name="unmigrated-wiki-markup" ac:schema-version="1" ac:macro-id="7ee4ec29-bcf1-4282-bae8-4e1542f43438"><ac:plain-text-body><![CDATA8079/ws] \]></ac:plain-text-body></ac:structured-macro>
ENABLE=1
PATH=C:\TOTVS 12\Microsiga\protheus_data\web\ws
ENVIRONMENT=P12
INSTANCENAME=ws
RESPONSEJOB=JOB_WS_01010101
DEFAULTPAGE=wsindex.apw
<ac:structured-macro ac:name="unmigrated-wiki-markup" ac:schema-version="1" ac:macro-id="20164512-45cb-4ef6-81f2-57f6f0e866e3"><ac:plain-text-body><![CDATA[JOB_WS_01010101] \]></ac:plain-text-body></ac:structured-macro>
TYPE=WEBEX
ENVIRONMENT=P12
INSTANCES=1,1
SIGAWEB=WS
INSTANCENAME=ws
ONSTART=__WSSTART
ONCONNECT=__WSCONNECT
PREPAREIN=01,010101
<ac:structured-macro ac:name="unmigrated-wiki-markup" ac:schema-version="1" ac:macro-id="3e5d7cca-f30d-4cb2-8b63-d8787f67622e"><ac:plain-text-body><![CDATA[ONSTART] \]></ac:plain-text-body></ac:structured-macro>
JOBS=JOB_WS_01010101,JOB_PP
<ac:structured-macro ac:name="unmigrated-wiki-markup" ac:schema-version="1" ac:macro-id="9005df01-6ae6-4841-9b9b-0b2fcb5468db"><ac:plain-text-body><![CDATA8079/pp] \]></ac:plain-text-body></ac:structured-macro>
ENABLE=1
PATH=C:\TOTVS 12\Microsiga\protheus_data\web\pp
ENVIRONMENT=P12
INSTANCENAME=pp
RESPONSEJOB=JOB_PP
<ac:structured-macro ac:name="unmigrated-wiki-markup" ac:schema-version="1" ac:macro-id="ac75a2fe-dde7-469f-a5fe-a534e3c09caf"><ac:plain-text-body><![CDATA[JOB_PP] \]></ac:plain-text-body></ac:structured-macro>
TYPE=WEBEX
ENVIRONMENT=P12
INSTANCES=1,1
SIGAWEB=PP
INSTANCENAME=pp
ONSTART=STARTWEBEX
ONCONNECT=CONNECTWEBEX
ONEXIT=FINISHWEBEX
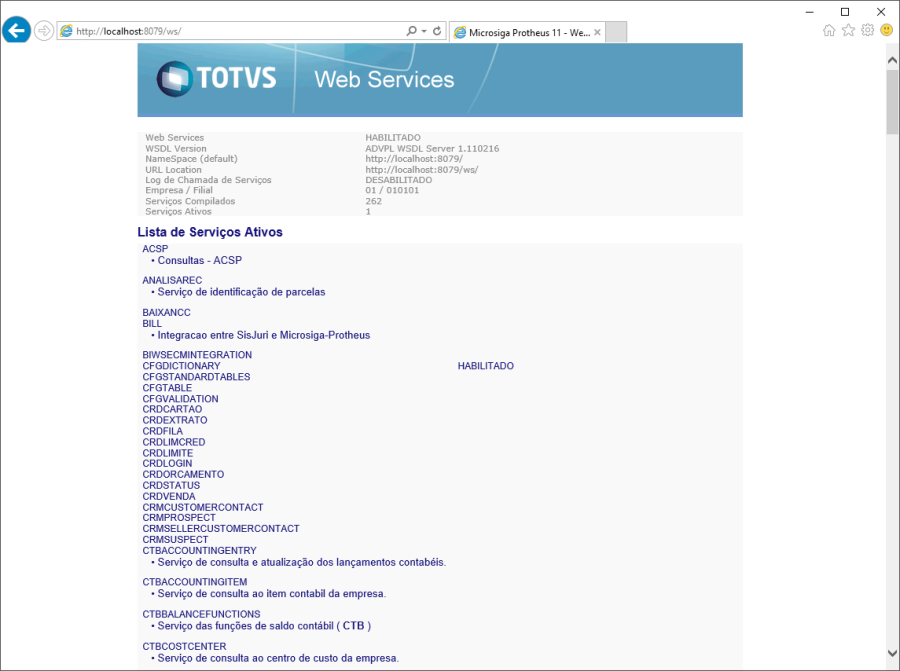
WEBSERVICELOCATION= http://localhost:8079/ws - After restarting the Application Server to test if the service of the Webservices started properly, open the WebService address in the browser (Internet Explorer, which is the browser homologated for Portals and Webservices) as example: http://localhost:8079/ws
|


